Photo by: Charlie Marshall, CC
Basics
The way a flash works is by pulsing very brief bursts of light, so you must set the camera around these short bursts. Therefore, in my opinion it is necessary to master manual mode before being able to incorporate flash into your photography well.
The first setting to prepare should be the shutter speed. The range for the flash sync speed is between 1/60 to 1/250 second. Too fast and the camera won’t be able to capture the brief pulse of the flash without a High-Speed Sync mode. Flash isn’t affected by shutter speed. It is only necessary that the pulse of the flash be captured within the time that the shutter stays open. Shutter speed does affect, however, ambient light; slower shutter speeds will strengthen ambient lighting. Realistically, anything slower than 1/60 is only going to be needed for low ambient lighting or artistic effects (motion blur). The main consideration for shutter speed is, as always, whether you need motion blurred or frozen. It’s just that with flash, you have an additional layer of limitation that must be worked around.
As for aperture, you change the aperture to expose for the ambient light. Once the ambient light suits your taste, you adjust the flash distance and power (or TTL exposure) to properly expose the subject. The ISO sensitivity also affects both the ambient light and flash, so it would only be increased in extremely low light environments.
Flash power is related to its distance by the Inverse Square Law, meaning, light intensity decreases drastically the further its distance from the source. In terms of numbers, you can expect:
Flash at 1/2 the distance is 4x brighter, and at 2x distance is 1/4 the brightness (2 stops).
Flash at 1/3 the distance is 9x brighter, and at 3x the distance is 1/9 the brightness (3 stops).
Flash at 1/4 the distance is 16x brighter, and at 4x the distance is 1/16 the brightness (4 stops). So on and so forth.
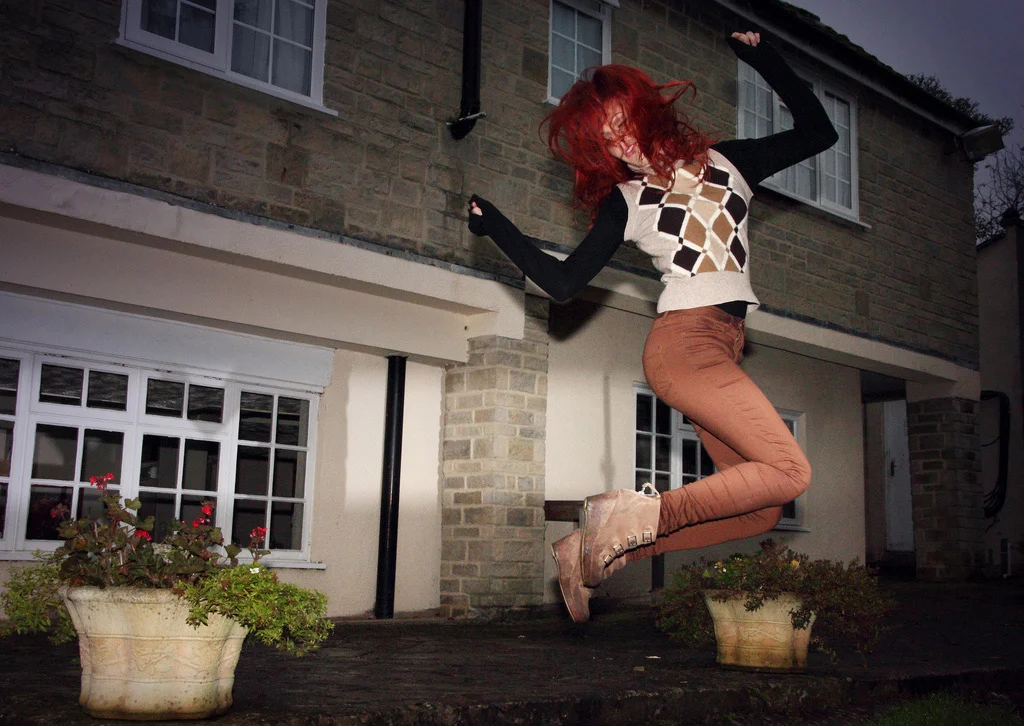
HSS flash required for this jump shot
Photo by: Charlie Marshall, CC
In my opinion, the best use of flash is off-camera. This setup requires more equipment, such as light-stands and wireless triggers/hot shoe flash cords, but allows for more artistic possibilities. Also, when mounted on top of the camera, the line of fire of the flash is too close to the lens, which can cause red eye and harsh, flat highlights (not very attractive). Also, a flash too close to the camera can cast shadows from the lens hood to the lens.
In most natural light situations, the ambient light is oftentimes from above and never below. In the same sense, flash should be positioned from above to appear more aesthetically pleasing and natural.
Common Mistakes: Not using flash when it is appropriate, and using too strong of a flash when it is used (hint: expose for the background first).
Flash Exposure
Flash exposure is affected by distance and flash power, which is measured as full power, half power, 1/4, 1/8, and so on up to 1/128. Advanced flashes have ETTL metering, which means that when the shutter is released, the flash fires extremely fast pulses of light and bases its own exposure off of them. ETTL exposure can be adjusted with flash compensation (-3 EV to +3 EV).
Common Mistakes: Trying to use the flash on distant subjects. The range of the flash is limited, you probably won’t be able to light up band players during a concert when you’re at the back of the stadium.
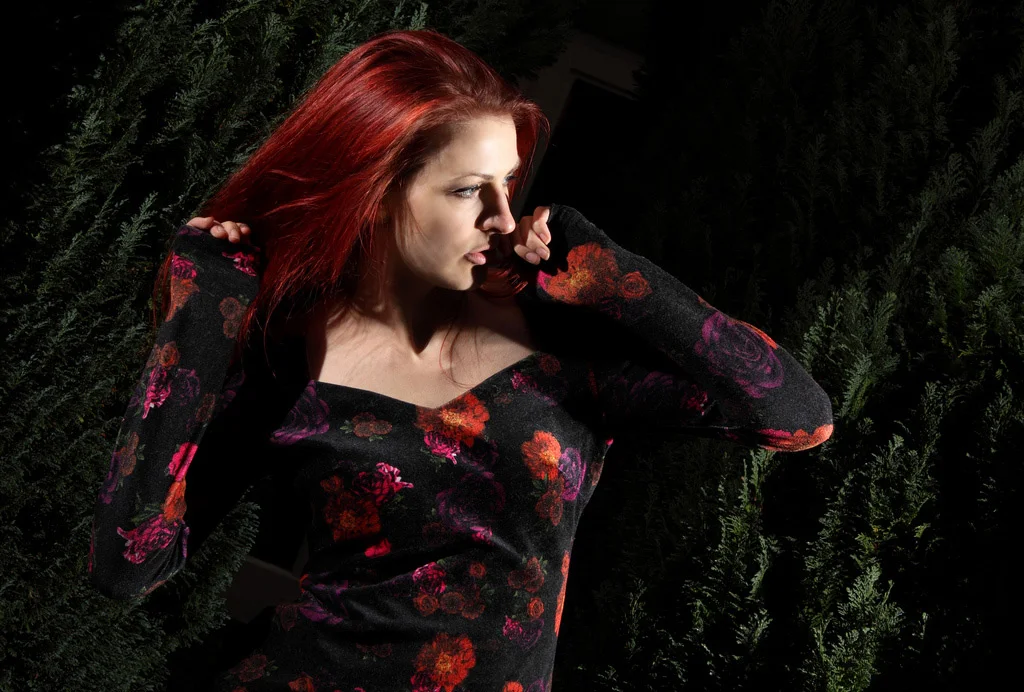
Fill-in Flash
Softer shadows create drama.
Photo by: Charlie Marshall, CC
Common Mistakes: Using flash to fill in and eliminate shadows completely, creating a flat, strong-highlight look to the photo that can appear unnatural.
Diffusing the Light
Straight bursts of light from flashguns are oftentimes harsh and unflattering. A flash can be diffused to give a softer look through to use of accessories such as an umbrella, a softbox, a reflector, or a plastic diffuser. Techniques used to diffuse flash include bouncing it off a ceiling or wall. Note that when using accessories or techniques to diffuse the flash, its light output will be reduced by a stop or two. Or three. If TTL is used, it will increase its power accordingly. If you are using manual flash, just be mindful to increase the power or close the distance a little.
Common Mistakes: Trying to bounce the flash against the sky.
Umbrellas and Softboxes
These are mounted over or in front of the flash to make its light spread out more, giving a more even highlight than shooting without them.
Reflectors
Reflectors are great at using the power of the sun (white and silver) like a portable light bulb. You can use them to reflect light on your subjects. Reflectors can also be positioned on the ground or wall to increase flash output by deflecting wasted light back onto the subject.
Bouncing Flash
When the flash still needs more softening and diffusing to look less harsh and artificial, one of the best solutions is to bounce it off a wall or ceiling. White or off-white walls are the best for this. Most flashes can be tilted and swiveled, providing plenty of options for bouncing.
By bouncing the flash, you can spread it over a larger area to produce a smoother, softer, and natural looking light. Be wary of how you direct your flash, since bouncing can create unflattering shadows under the eyes, nose, and chin.
Off-Camera Flash
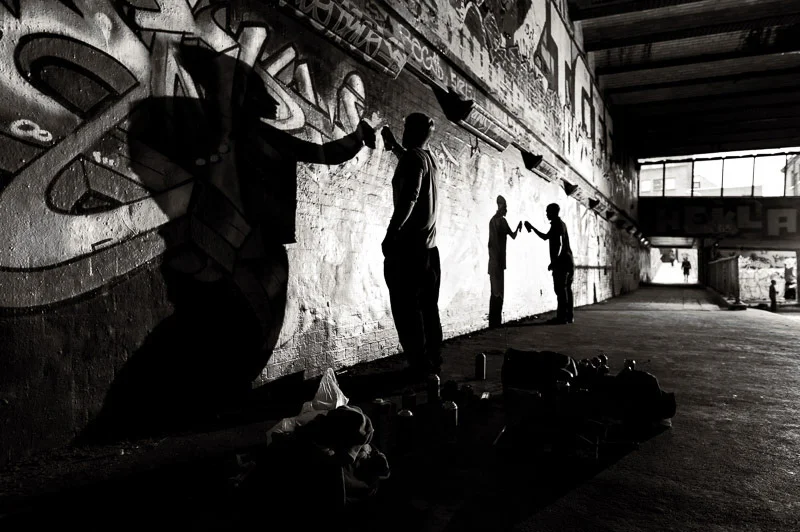
Photo by: Mark Suddaby, CC
Common Mistakes: Getting flares from flashes that are still partially in the frame.
Hot Shoe Flash Cords
Hot shoe flash cords connect to the hot shoe of the camera and the base of the flash, allowing slight separation between the camera and flash possible. If you require mobility but want the flash to be slightly off-camera, you can combine the use of a hot shoe flash cord with a flash bracket, which can latch to the camera’s tripod socket and allow the flash to mount off to the side.
Wireless Triggers
Wireless triggers allow flash to be used completely off the camera, allowing for greater versatility and creativity at the cost of mobility. However, more than one flash can be used at the same time this way. Wireless triggering is possible through the use of a transmitter on the camera and a receiver on each of the flashes.
Multiple Flashes
Once you have mastered the use of a single flash, you can move on to multiple flashes to up your creative options. Multiple flashes allow you to light up hair, background, large groups, and anything else you can think of that needs extra lighting.
2nd Curtain/Rear Curtain Flash
When using flash and slow shutter speeds, the flash normally goes off at the start of the opening of the shutter. When this happens, motion blur will extend in front of the subject, which does not look like natural motion. By setting up rear/2nd curtain flash, the flash will go off at the end of the exposure, giving the subject a more natural motion blur from behind.
If you have situations where you are capturing your subjects are blinking consistently, try using 2nd curtain to see if that will solve the problem. There might be a timing problem between the camera and the flash. Likewise, if you are using HSS and have a timing issue with capturing the flash, try 2nd curtain.
Written by: Brandon Yuong